A material, in Lùmen, is a set of starting values for engraving, scoring and cutting: speed, power, resolution and passes. Lùmen fits them to your laser. The real mark also depends on the colour, the thickness and the focus, though: the test grid is how you find the right numbers on the sheet you will use.
Choosing the material
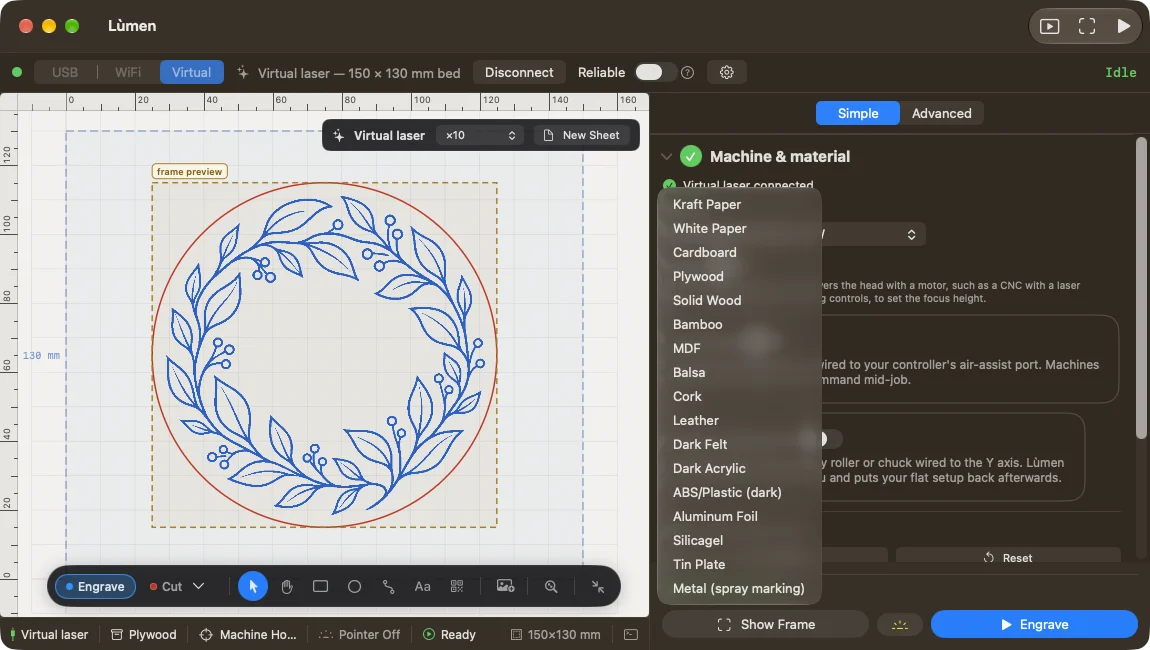
In Machine & material (in Advanced, the Material section) choose a material from the list. The icons next to its name say what it can do: engrave, score, cut. Below, the panel sums up the values it will use.
The built-in materials were measured on a 3 W laser. If your machine has another, Lùmen fits the numbers to its optical power and says so under the material: it is an estimate, which the test grid makes exact. That is why choosing the machine with the right power matters.
If the project already has objects, before applying another material Lùmen tells you what will change. Afterwards you can fine-tune each operation or an image.
Saving a material of your own
Once you have found the right values, press the + next to the list, give it a name and save: Lùmen keeps the engrave, score and cut values in use at that moment. The pencil edits a material of yours; the bin removes it.
A built-in material can’t be edited: the button next to it opens a copy to edit, so the original values stay available. Saving the copy applies it to the project.
The test grid
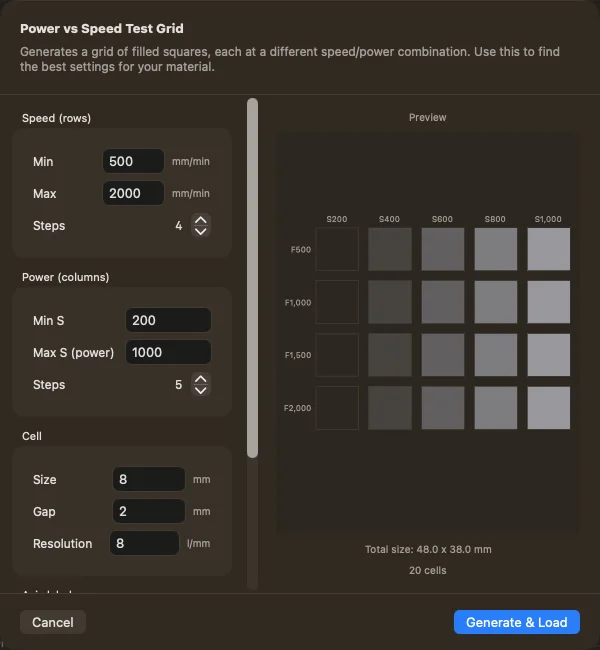
The grid engraves a set of squares, each with a different speed and power. Each row is a speed, each column a power. It is best to start from a new project.
- Choose File ▸ Power/Speed Test Grid….
- In Speed (rows) enter the minimum, the maximum and how many rows you want.
- In Power (columns) enter Min S, Max S and how many columns. S is GRBL’s power number: Lùmen suggests a range on your controller’s maximum and, if it knows your laser, fits it to its power.
- In Cell choose the size of the squares, the gap between them and the resolution. The preview shows the total size: check that it fits on your sample.
- Leave Engrave F / S labels on if you want the numbers next to the rows and columns. They are marked at the grid’s mildest cell, so they don’t burn the piece.
- Press Generate & Load, place the grid on the sample with Show Frame and start.
Reading the result
Pick the square closest to what you want: dark enough, clean edges, no scorching. Read its speed (F) and power (S) and put them in the operation or in a material of your own. If every square is too strong or too weak, run the grid again with a different range.
Write down how you measured it. Material, thickness, machine, laser power, focus and the square you chose. A saved material is only really useful if you know what it was tested on. If you change the material or the laser module, test again.