Lùmen keeps your project and the laser’s controls in one window. You can prepare a project without a machine connected.
The five parts of the window
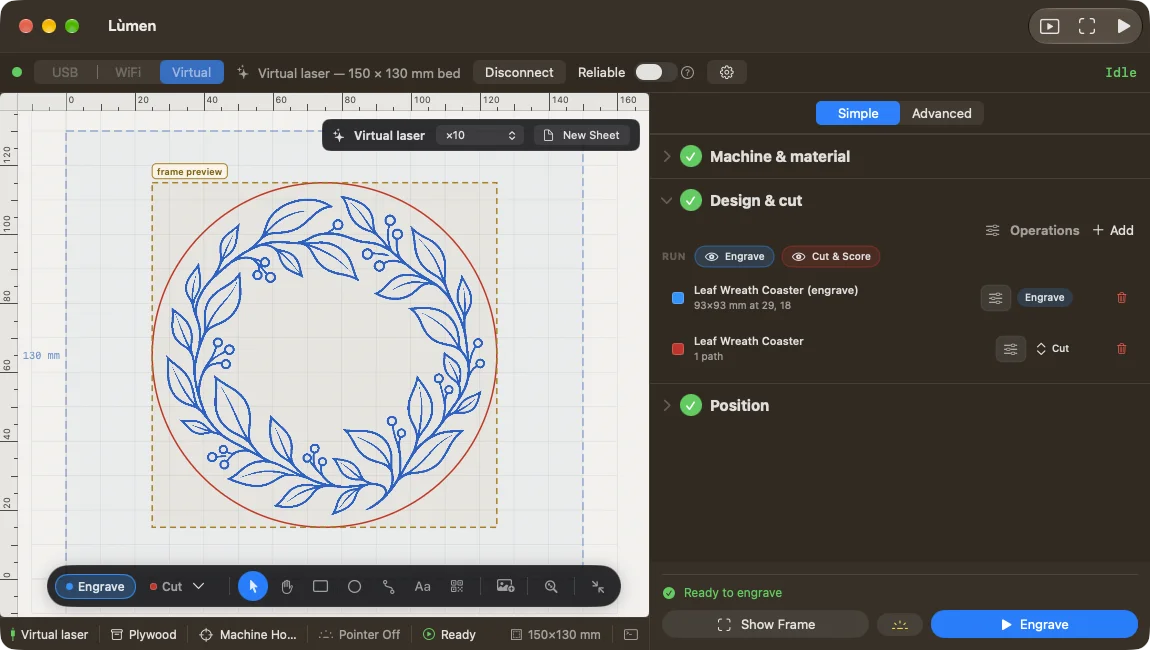
- The connection bar, at the top. Choose USB, WiFi or Virtual and press Connect. Next to it are the connection status, the Reliable switch and, behind the gear, the connection settings.
- The canvas, in the middle. It is the machine’s bed in millimetres, with the project’s objects and, once a machine is connected, where the head is. View ▸ Fit to Scene (⌘9) brings the whole project back into view.
- The toolbar, on the canvas. On the left you choose which operation you are drawing on; then the tools: select, hand to move the view, rectangle, ellipse, pen, text and codes. The button at the end folds it into a corner.
- The side panel, on the right. At the top you choose Simple or Advanced. At the bottom, Show Frame and the button that starts the job are always there.
- The status bar, at the bottom. It sums up the connection, the material, the origin, the pointer, the machine’s state and the size of the bed. The last icon opens the console.
Simple or Advanced
Simple follows the order of a job in three tabs: Machine & material, Design & cut and Position. A tick marks the tabs that are complete, but you can open them in any order.
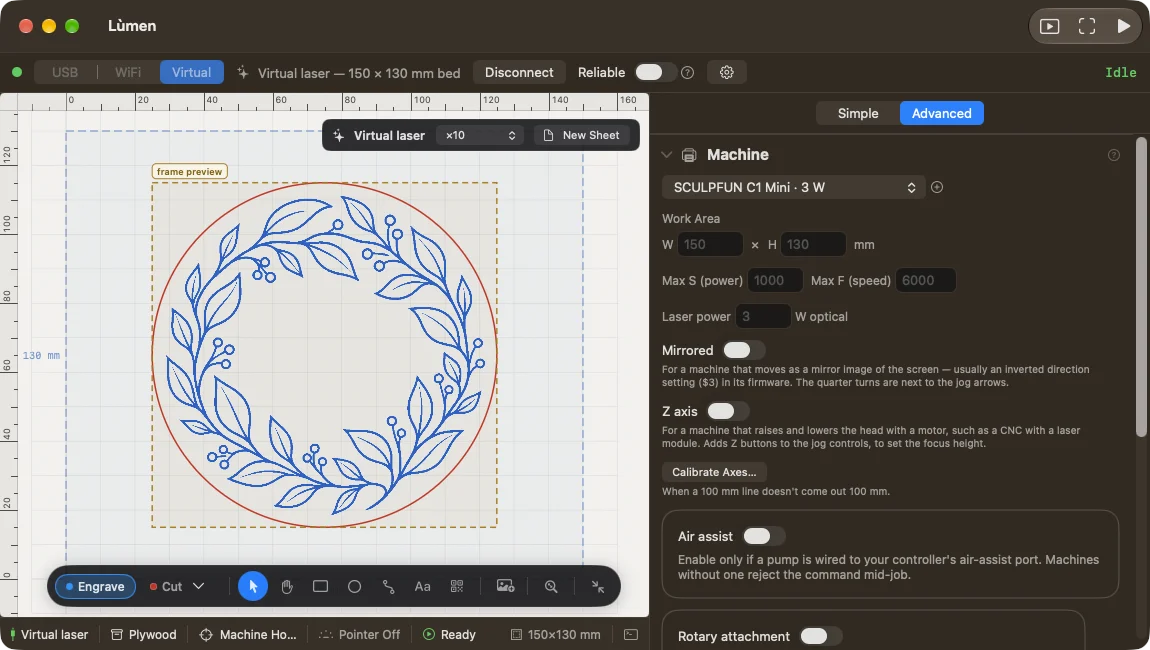
Advanced puts everything in one panel, in sections that open and close: Machine, Machine Status, Jog Controls, Work Origin, Material, Layers and Job. Use it when you want to adjust the machine, read GRBL’s state or change a detailed setting.
You can switch between them at any time: the project and its settings stay the same.
A first try without a machine
To find your way around, choose Virtual in the top bar, press Connect and draw a shape on the canvas. The virtual laser works on the bed of the machine you chose and lets you try Show Frame and a whole job on screen. The step-by-step walk-through is Your first job.